2022. 12. 3. 02:24ㆍ_Study/AndroidStudio
13-2 액티비티 생명주기 🐇¸.•*¨*•¸.•*¨*•¸.•*¨*•¸.•*¨*•
해당 자료는 강의 학습자료이며, Do it! 깡샘의 안드로이드 앱 프로그래밍 with 코틀린을 참고하였습니다.
액티비티의 상태
생명주기 : 액티비티가 생성되어 소멸하기까지의 과정
- 활성 : 액티비티 화면이 출력되고 있고 사용자가 이벤트를 발생시킬 수 있는 상태
- 액티비티가 실행되어 화면에 나오고 사용자 이벤트를 처리할 수 있는 상태
- onCreate() -> onStart() -> onResume()
- 일시정지: 액티비티 화면이 출력되고 있지만 사용자가 이벤트를 발생시킬 수 없는 상태
- onPause() 함수까지 호출된 상태
- 액티비티가 화면에 보이지만 포커스를 잃어 사용자의 이벤트를 처리할 수 없는 상태
- 비활성 :액티비티 화면이 출력되고 있지 않는 상태
- 액티비티가 종료되지 않고 화면에만 보이지 않는 상태
- 비활성 상태가 되면 onPause() -> onStop() 함수 까지 호출
- 액티비티가 종료된다는 것은 onDestroy() 까지 호출되었다는 의미
- 뒤로가기 버튼 or finish() 함수
그림
액티비티의 상태 저장
액티비티가 종료되면 객체가 소멸하므로 액티비티 데이터는 모두 사라진다. 상태를 저장한다는 것은 액티비티가 종료되어 메모리의 데이터가 사라지더라도 다시 실행할 때 사용자가 저장한 데이터로 액티비티의 상태를 복원하겠다는 의미이다.
화면을 회전하면 액티비티가 종료되었다가 나오기에 데이터가 초기화 된다.
액티비티를 종료할 때 저장했다가 복원해야할 데이터가 있다면 Bundle 이라는 객체에 담아준다.
onCreate(), onSaveInstanceState(), onRestoreInstanceState() 함수는 매개변수를 가지며 모두 Bundle 객체이다.
- onSaveInstanceState() 함수의 매개변수로 전달되는 Bundle에 데이터를 담아주면 자동으로 데이터를 파일로 저장한다.
- 다시 액티비티가 생성되어 실행될 때 캐싱파일이 있다면 그 내용을 읽어서 번들 객체에 담아 onCreate(), onRestoreInstanceState() 함수의 매개변수로 전달한다.
EditText에 입력한 글은 내부에 저장하므로 저장과 복원을 신경쓰지 않아도 된다.
onCreate()
onStart()
onRestoreInstanceState()
onResume()
화면 회전
onPause()
onStop
onSaveInstanceState()
종료
onDestroy()
새 화면 생성 (돌린 화면)
onCreate()
onStart()
onRestoreInstanceState()
onResume()
onPause()
13-3 액티비티 제어 🐇¸.•*¨*•¸.•*¨*•¸.•*¨*•¸.•*¨*•
해당 자료는 강의 학습자료이며, Do it! 깡샘의 안드로이드 앱 프로그래밍 with 코틀린을 참고하였습니다.
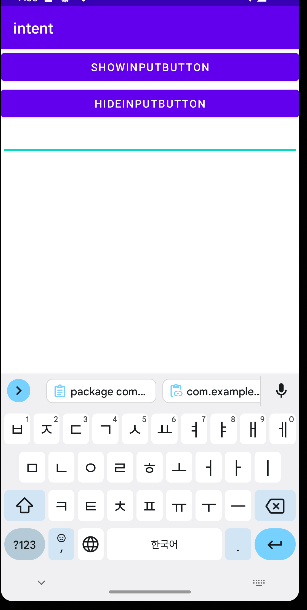
소프트 키보드 제어하기
입력매니저
특정한 순간에 키보드를 올리거나 내려야 할수도 있는데 이때 InputMethodManager 클래스가 이를 지원한다.
public boolean hideSoftInputFromWindow IBinder windowToken , int flags)
public boolean showSoftInput (View view , int flags)
public void toggleSoftInput (int showFlags , int hideFlags)
requestFocus() 로 뷰에 포커스를 강제할 수 있다.
package com.example.intent

import androidx.appcompat.app.AppCompatActivity
import android.os.Bundle
import android.view.inputmethod.InputMethodManager
import com.example.intent.databinding.ActivityMainBinding

class MainActivity : AppCompatActivity() {
   lateinit var binding : ActivityMainBinding

    override fun onCreate(savedInstanceState: Bundle?) {
        super.onCreate(savedInstanceState)
        binding = ActivityMainBinding.inflate(layoutInflater)
        setContentView(binding.root)

        val manager = getSystemService(INPUT_METHOD_SERVICE) as InputMethodManager
        binding.showInputButton.setOnClickListener{
            binding.editText.requestFocus()
            manager.showSoftInput(binding.editText,InputMethodManager.SHOW_IMPLICIT)
        }
        binding.hideInputButton.setOnClickListener{
            manager.hideSoftInputFromWindow(currentFocus?.windowToken,
            InputMethodManager.HIDE_NOT_ALWAYS)
        }
    }
}
입력모드 설정
키보드가 올라올 때 액티비티가 함께 위로 올라오게 할 수도 있고 액티비티의 크기를 조정할 수도 있다.
매니페스트 파일에서 <activity> 태그의 windowSoftInputMode 속성을 이용한다.
android:name=".MainActivity" android:windowSoftInputMode="adjustPan"
android:name=".MainActivity" android:windowSoftInputMode="stateVisible"MainActivity 실행시 올라오길 바랬는데 잘 구현이 안된다.
- adjustPan : 키보드가 올라올 때 입력 에디트 텍스트에 맞춰 화면을 위로 올립니다
- adjustResize : 키보드가 올라올 때 액티비티의 크기를 조정합니다
- adjustUnspecified : 상황에 맞는 옵션을 시스템이 알아서 설정합니다 . ← 기본값
- stateHidden : 액티비티 실행 시 키보드가 자동으로 올라오는 것을 방지합니다
- stateVisible : 액티비티 실행 시 키보드가 자동으로 올라옵니다
- stateUnspecified : 시스템이 적절한 키보드 상태를 설정하거나 테마에 따릅니다 . ← 기본값
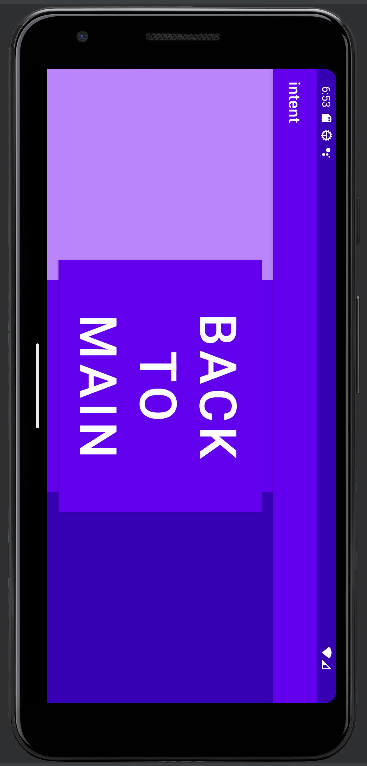
방향과 전체화면 설정하기
액티비티의 방향을 고정하고 싶다면 매니페스트 파일의 <activity> 태그의 screenOrientation 속성을 이용
값은 landscape나 portrait를 지정한다.
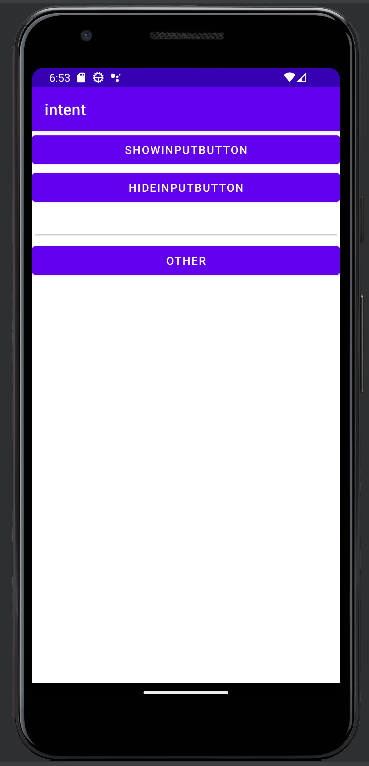
적용해보기 위해서 새로운 Activity SettingActivity를 만들고 intent설정을 새로했다.
코드첨부
mainActivity.kt
package com.example.intent

import android.content.Intent
import androidx.appcompat.app.AppCompatActivity
import android.os.Bundle
import android.view.inputmethod.InputMethodManager
import com.example.intent.databinding.ActivityMainBinding

class MainActivity : AppCompatActivity() {
   lateinit var binding : ActivityMainBinding

    override fun onCreate(savedInstanceState: Bundle?) {
        super.onCreate(savedInstanceState)
        binding = ActivityMainBinding.inflate(layoutInflater)
        setContentView(binding.root)

        val manager = getSystemService(INPUT_METHOD_SERVICE) as InputMethodManager
        binding.showInputButton.setOnClickListener{
            binding.editText.requestFocus()
            manager.showSoftInput(binding.editText,InputMethodManager.SHOW_IMPLICIT)
        }
        binding.hideInputButton.setOnClickListener{
            manager.hideSoftInputFromWindow(currentFocus?.windowToken,
            InputMethodManager.HIDE_NOT_ALWAYS)
        }
        binding.other.setOnClickListener{
            val intent = Intent(this,SettingActivity::class.java)
            intent.flags = Intent.FLAG_ACTIVITY_SINGLE_TOP
            startActivity(intent)
        }
    }
}
activity_main.xml
<?xml version="1.0" encoding="utf-8"?>
<LinearLayout xmlns:android="http://schemas.android.com/apk/res/android"
    xmlns:app="http://schemas.android.com/apk/res-auto"
    xmlns:tools="http://schemas.android.com/tools"
    android:layout_width="match_parent"
    android:layout_height="match_parent"
    tools:context=".MainActivity"
    android:orientation="vertical">

    <Button
        android:id="@+id/showInputButton"
        android:layout_width="match_parent"
        android:layout_height="wrap_content"
        android:text="showInputButton"/>
    <Button
        android:id="@+id/hideInputButton"
        android:layout_width="match_parent"
        android:layout_height="wrap_content"
        android:text="hideInputButton"/>
    <EditText
        android:id="@+id/editText"
        android:layout_width="match_parent"
        android:layout_height="wrap_content"
        />
    <Button
        android:id="@+id/other"
        android:layout_width="match_parent"
        android:layout_height="wrap_content"
        android:text="other"/>


</LinearLayout>
SettingActivity.kt
package com.example.intent

import android.content.Intent
import androidx.appcompat.app.AppCompatActivity
import android.os.Bundle
import com.example.intent.databinding.ActivitySettingBinding

class SettingActivity : AppCompatActivity() {
    lateinit var binding : ActivitySettingBinding
    override fun onCreate(savedInstanceState: Bundle?) {
        super.onCreate(savedInstanceState)
        binding = ActivitySettingBinding.inflate(layoutInflater)
        setContentView(binding.root)

        binding.btnMain.setOnClickListener {
            val intent = Intent(this, MainActivity::class.java)
            intent.flags = Intent.FLAG_ACTIVITY_SINGLE_TOP
            startActivity(intent)
        }
    }
}
activity_setting.xml
<?xml version="1.0" encoding="utf-8"?>
<RelativeLayout xmlns:android="http://schemas.android.com/apk/res/android"
    xmlns:app="http://schemas.android.com/apk/res-auto"
    xmlns:tools="http://schemas.android.com/tools"
    android:layout_width="match_parent"
    android:layout_height="match_parent"
    tools:context=".SettingActivity">

    <Button
        android:id="@+id/btnMain"
        android:layout_width="wrap_content"
        android:layout_height="wrap_content"
        android:text="back to main"
        android:background="#FFFFFF"
        android:textSize="65dp"
        android:layout_centerInParent="true"/>

    <LinearLayout
        android:layout_width="match_parent"
        android:layout_height="match_parent">

        <View
            android:layout_width="match_parent"
            android:layout_height="match_parent"
            android:layout_weight="1"
            android:background="@color/purple_200" />

        <View
            android:layout_width="match_parent"
            android:layout_height="match_parent"
            android:layout_weight="1"
            android:background="@color/purple_500" />

        <View
            android:layout_width="match_parent"
            android:layout_height="match_parent"
            android:layout_weight="1"
            android:background="@color/purple_700" />
    </LinearLayout>

</RelativeLayout>
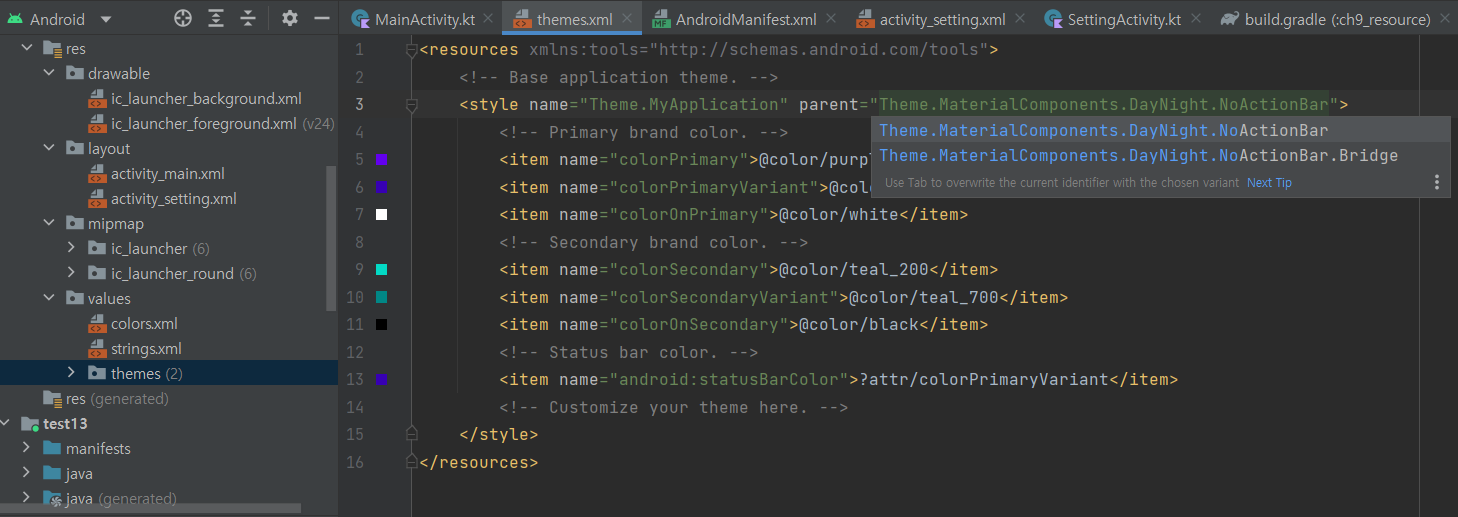
액티비티를 전체 화면으로 표시
액션바가 출력되지 않게 설정
액티비티 코드에서 전체 화면으로 출력되게 설정
- API 레벨 29 까지는 window.setFlags () 함수를 이용해 전체 화면을 지정
import android.view.WindowManager.LayoutParams.*

window.setFlags(
    FLAG_FULLSCREEN,
FLAG_FULLSCREEN
)
- API 레벨 30 부터는 WindowInsetsController 라는 클래스의 함수를 이용해 액티비티 창을 설정

'_Study > AndroidStudio' 카테고리의 다른 글
| 코틀린 언어 소개 / 변수와 함수 (0) | 2022.12.04 |
|---|---|
| 안드로이드 앱의 기본 구조 (2) | 2022.12.04 |
| 안드로이드 스튜디오 개인 세팅 (0) | 2022.12.04 |
| 액티비티 제어 정리 (0) | 2022.12.03 |
| 액티비티 컴포넌트 정리 (0) | 2022.12.03 |